Redirect to Product Page | No |
---|---|
Google Product Category | 111 |
Brand | Print Pronto |
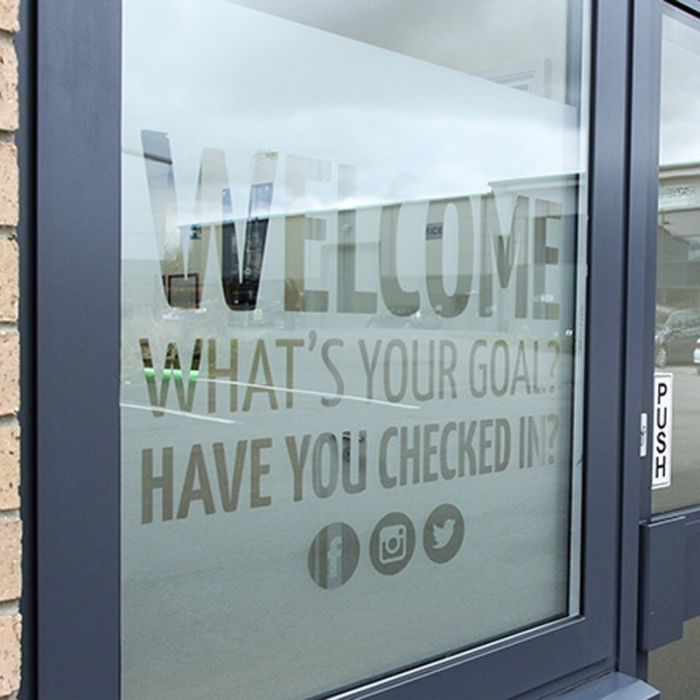
Stand out on the streets with frosted lettering
Make your storefront stand out while maximizing natural light. Frosted vinyl lettering is a low-cost option for adding a touch of sophistication to your business. With logos or text that can be applied behind or in front of windows, your shop or office will surely capture the eyes of passersby.
Frosted lettering is cut (not printed) from 2 mil. adhesive vinyl. The material is reverse cut, which means that the background of the design will be translucent while the logo or text remains clear. This will give you the look of sandblasted glass at a reasonable price. And because the vinyl is semi-transparent, the decals offer some privacy without blocking all the light.
How to Install Frosted Lettering
1. Clean and dry the surface where the lettering will be installed.
2. After measuring and marking your intended installation location if necessary, apply a horizontal strip of masking or painters tape to the top of the graphic with the top half of the tape on the intended surface, creating a hinge.
3. Hold the bottom edge of the hinged graphic away from the intended surface and remove the back liner (which is different from the transfer tape), revealing the sticky backing of your lettering or graphic. Be careful not to allow the exposed adhesive to touch the surface.
4. Using a squeegee*, apply pressure to the front or pre masked side of your lettering, placing the graphic onto the intended surface. Squeegee from left to right from the top down. If creases or bubbles develop, carefully lift the graphic and re-squeegee it. *Available for purchase with vinyl lettering.
5. Once in place without creases or bubbles, squeegee the entire lettering or graphic to ensure the adhesive is firmly attached to the surface.
6. Gently remove the pre-mask transfer tape, starting at a top corner. If any vinyl begins to come off the wall, use your squeegee to firmly adhere it back to the wall and continue peeling away the premask.
7. Laying the liner over the graphic with the shiny side facing you, apply hard pressure with the squeegee, removing any stubborn air bubbles.
Material: 2 mil. Adhesive Vinyl
Cut: Standard Cut
Application Location: To Apply Behind Window
Accessories: None